Notifications for an application
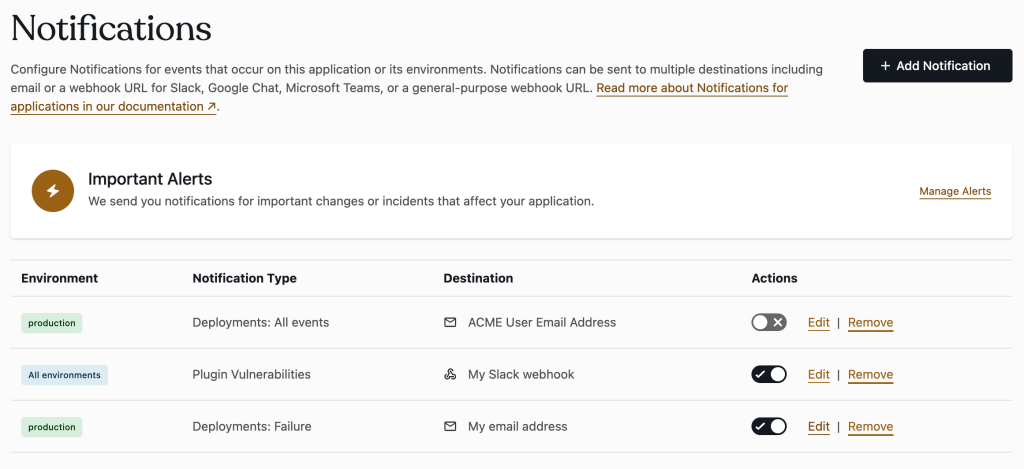
Automated Notifications can be configured for events that occur on an application’s environments (e.g., code deployments, plugin vulnerabilities identified in application code).
Manage Notifications for an application’s environments in the VIP Dashboard for that application. Notifications for an application can be configured per-environment type (production vs. non-production), or for a single specific environment of that application.
Access
Prerequisite
To view, add, edit, or remove Notifications for an application—or to add a new Destination for an application’s Notifications—a user must have at minimum an App write role for that application or an Org member role.
To access the Notifications panel for an application:
- Navigate to the VIP Dashboard for an application.
- Select “Access & Routing” from the sidebar navigation at the left of the screen.
- Select “Notifications” from the navigation submenu.
The Notifications panel also provides access to the Important Alerts panel for users with an App admin role for that application or an Org admin role.
Add a Notification
Create a Notification for one or more of an application’s environments within the Notifications panel:
- Select the button labeled “+ Add Notification” located in the upper right of the panel.
- Select Environment: Select the field with the placeholder text “Choose environment or start typing“. Select the environment(s) from the dropdown list for which the Notification will be enabled, or type the name of an environment into the field. As characters are entered into the search field, environments that match the characters can be selected from a dynamically generated dropdown list.
- All Environments
- All Non-Production Environments
- A specific environment: Select a specific environment belonging to a single application by type (e.g., Preprod, Develop, QA1).
- Notification Type: Configure either “Deployments” or “Plugin Vulnerabilities” as the environment event to be communicated in the Notification.
- Deployments: Enable a Notification for the status of a code deployment (e.g., “Deployment success”, “Deployment failure”).
- Select the button labeled “Show options“. Select 1 or more of the displayed deployment status types.
- Or, select the checkbox labeled “Deployments” located in the upper right of the “Deployments” configuration box to enable Notifications to be sent for all deployment status types.
- Plugin Vulnerabilities: Enable a Notification for all plugin vulnerabilities (low, medium, high, and critical) identified by Codebase Manager in the the deploying branch of the environment’s wpcomvip GitHub repository.
- Deployments: Enable a Notification for the status of a code deployment (e.g., “Deployment success”, “Deployment failure”).
- Destination: Select a Destination for this Notification from the list of options in the dropdown menu. Select the field with the placeholder text “Choose Destination or start typing“. Type or select a Destination for this Notification from the dropdown list. Or, add a new Destination to the option list by selecting the button labeled “+ Add New Destination” and follow the prompts.
- Select the button labeled “Add Notification” located in the upper right of the panel to complete the creation of the Notification with the selected configurations.
Enable or disable a Notification
Configured Notifications that are listed in the application’s Notifications panel can be selectively enabled or disabled. A toggle button is displayed to the right of each listed Notification. Select the button to enable (“✔️”) or disable (“✖️”) the Notification.
Edit a Notification
Configured values for a Notification that is listed in the application’s Notifications panel can be updated.
- Select the linked text “Edit” located to the right of a listed Notification.
- Update the configuration options for the Notification as needed.
- Select the button labeled “Update Notification” located in the upper right of the panel to save all changes made to the configuration of the Notification.
Remove a Notification
Configured Notifications that are listed in the application’s Notifications panel can be selectively removed.
- Select the linked text “Remove” located to the right of a listed Notification. A dialog titled “Remove Notification” will display a summary of the Notification’s configuration, and require confirmation from the user before the Notification is removed.
- To proceed with the removal of the Notification, select the button labeled “Remove Notification“.
Last updated: July 15, 2024