Custom TLS certificates with a VIP CSR
A certificate signing request (CSR) from VIP can be generated in order to obtain a custom certificate from a Certificate Authority (CA). A CSR generated by VIP contains the necessary information, plus VIP’s authorization, that the CA needs to process a TLS certificate.
A custom TLS certificate can be generated and installed before a domain has been verified and before the DNS for a domain is pointed to VIP.
Access
Prerequisite
- Installing a TLS certificate for a domain in the VIP Dashboard requires a user to have at minimum an App write role for that application or an Org member role.
- In order to successfully install a generated custom TLS certificate, it must meet all of the requirements.
- Navigate to the VIP Dashboard for the application that the domain is associated with.
- Select the environment that the domain points to (e.g., production, develop) from the dropdown located at the upper left of the dashboard.
- Select “Domains & TLS” from the sidebar navigation at the left of the screen.
- Add the domain by selecting the “Add Domain” button in the upper right if it does not yet appear in the Domains list.
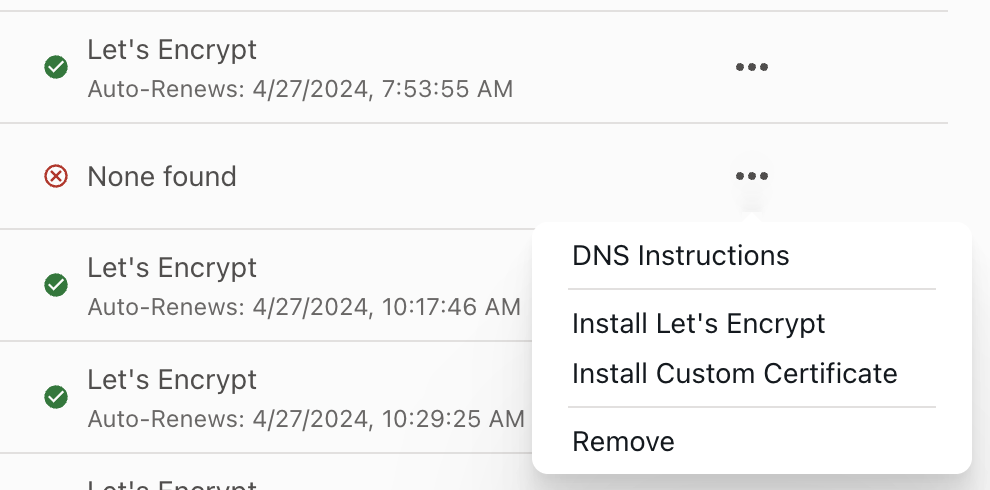
- Select the “•••” button located to the right of the domain.
- Select “Install Custom Certificate” from the overflow menu.
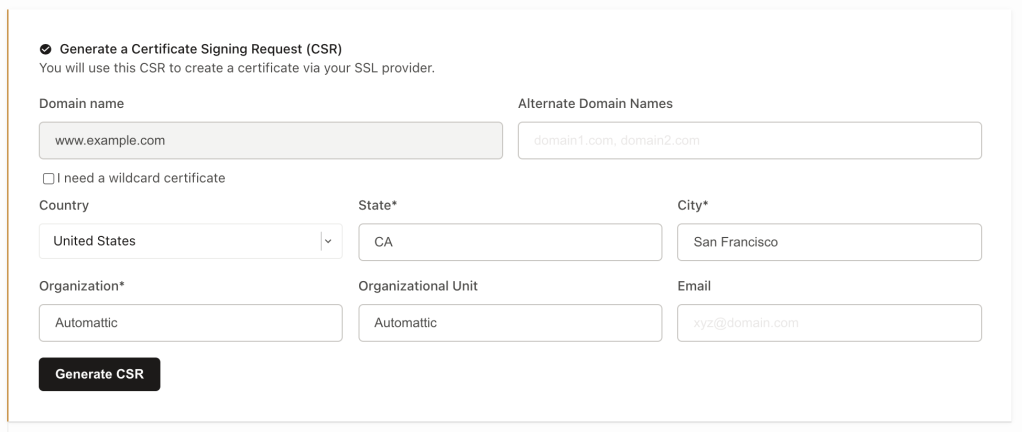
Generate a Certificate Signing Request (CSR)
- Select the “Create New CSR” tab.
- Complete the requested information for each field.
- (Optional) Enable wildcard for the domain by selecting the option labeled “I need a wildcard certificate”.
- If the value entered in the field labeled “Domain name” is a root domain (e.g.
example.com), the value in the field labeled “Domain Name” will be replaced by the wildcard value, and the field labeled “Alternate Domain Name” will be populated by the wildcard as well as the root domain. - If the value entered in the field labeled “Domain name” is a subdomain (e.g.
subdomain.example.com), the value in the field labeled “Domain Name” will be replaced by the wildcard value.
- If the value entered in the field labeled “Domain name” is a root domain (e.g.
- Select “Generate CSR” to generate a CSR based on the submitted values.
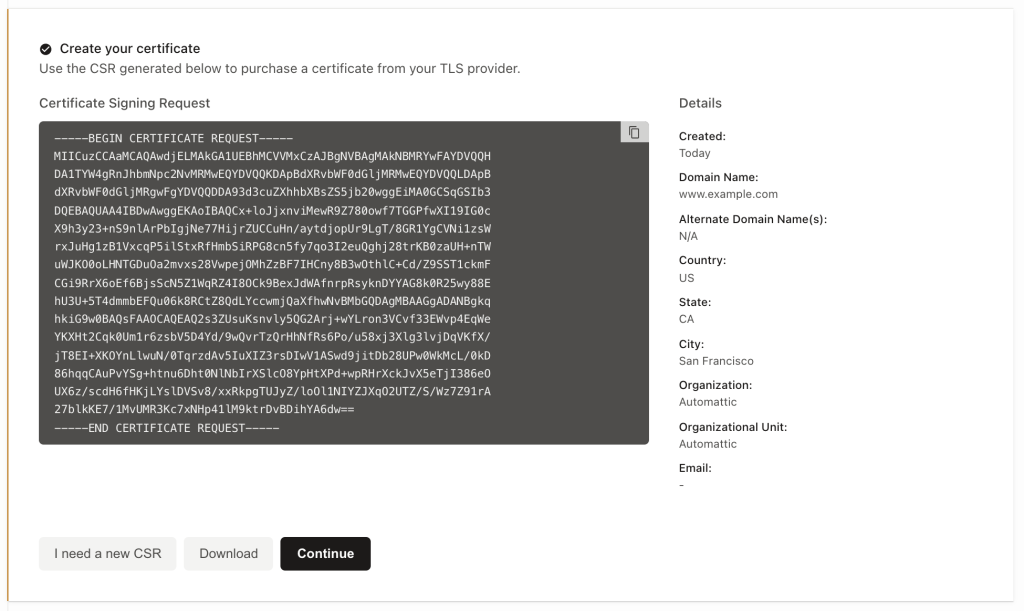
Create your certificate
Copy or download the generated CSR and provide the CSR to a Certificate Authority.
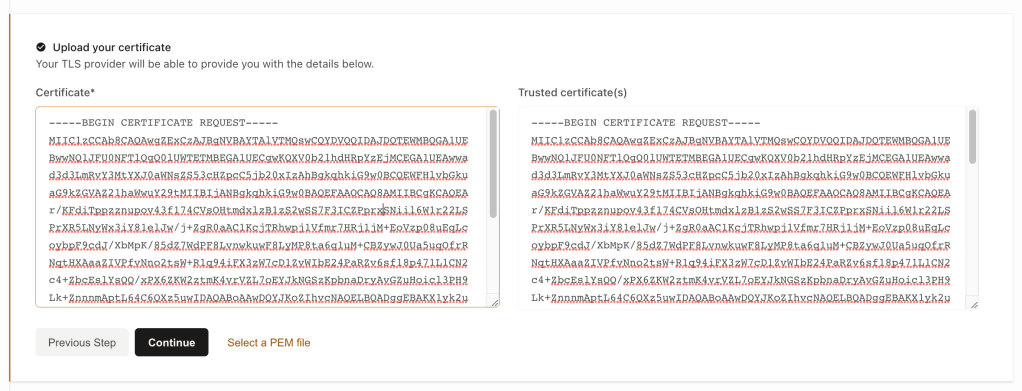
Upload your certificate
Once the Certificate Authority has generated and provided a certificate and a chain of trusted certificates, resume the installation process.
- Navigate to the VIP Dashboard.
- Select “Domains & TLS” from the sidebar navigation at the left of the screen.
- A button labeled “Install Certificate” will be displayed to the right of newly added domains in the Domains & TLS panel.
- Select the “Install Certificate” button to access and select the “Custom Certificate” option in the dropdown.
- Choose one of the following methods to add the certificates to the form fields:
- Copy and paste the contents of the certificates into each form field (Certificate and Trusted Certificate(s)).
- If all parts of the complete certificate chain are contained in a single PEM file, select the linked text “Select a PEM file” to upload the file source from the local machine.
- Select “Continue“.
- Follow the instructions to “Activate a custom certificate” found below.
Activate a custom certificate
The installation of a TLS certificate is not complete until it has been activated for a domain.
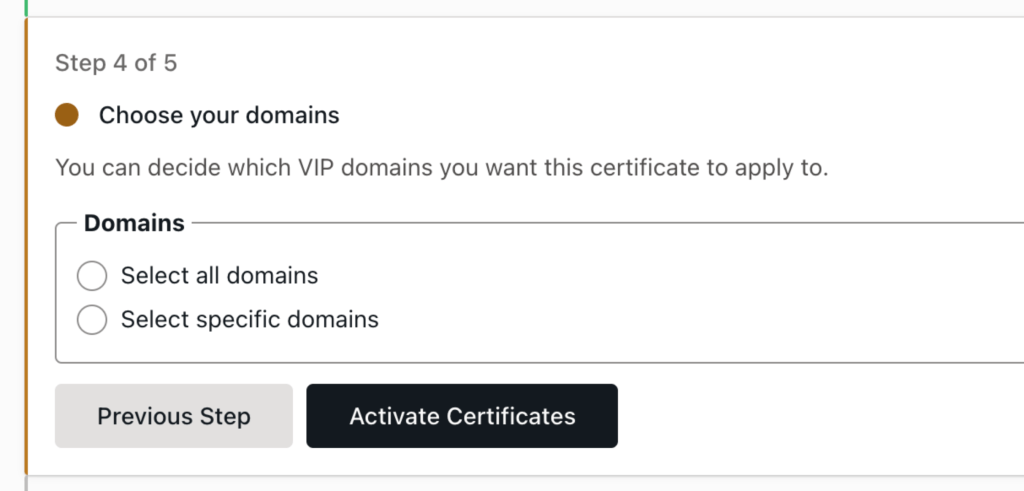
Choose your domains
After uploading a certificate chain:
- Select the option below the “Domains” label that is correct for the new TLS certificate that is being installed:
- Select all domains: Selecting this option indicates that the TLS certificate is applicable to all domains that have been added to the environment’s “Domains” panel.
- Select specific domains: Selecting this option will present the user with a dropdown list of domains that have been added to the environment’s “Domains” panel. Select one or more domains to which the TLS certificate should apply.
- Select the button labeled “Activate Certificates” to complete the TLS certificate installation and activation.
Confirm the certificate is working
- New TLS certificates may require up to 10 minutes to be enabled for a domain.
- Use a free online TLS testing tool such as SSLShopper or DigiCert.
- Browsers such as Firefox and Chrome provide tools for checking if a site’s connection is secure.
Last updated: June 10, 2025