Settings
The Settings panel in the VIP Dashboard provides a user with information about their VIP Dashboard user account and some management options.
Access
Prerequisites
To access the Settings panel a user must have access to the VIP Dashboard.
A logged-in user can navigate to the Settings panel in two ways:
- Select the avatar in the upper right corner of the VIP Dashboard, then select “Settings” from the dropdown menu.
- For users with access to the My Applications or the My Organizations panel, select “Settings” from the list of links displayed below a user’s profile in the left sidebar.
Profile
The Profile section of the Settings panel displays the current values for a user’s Name, Email, and associated VIP Authentication login method.
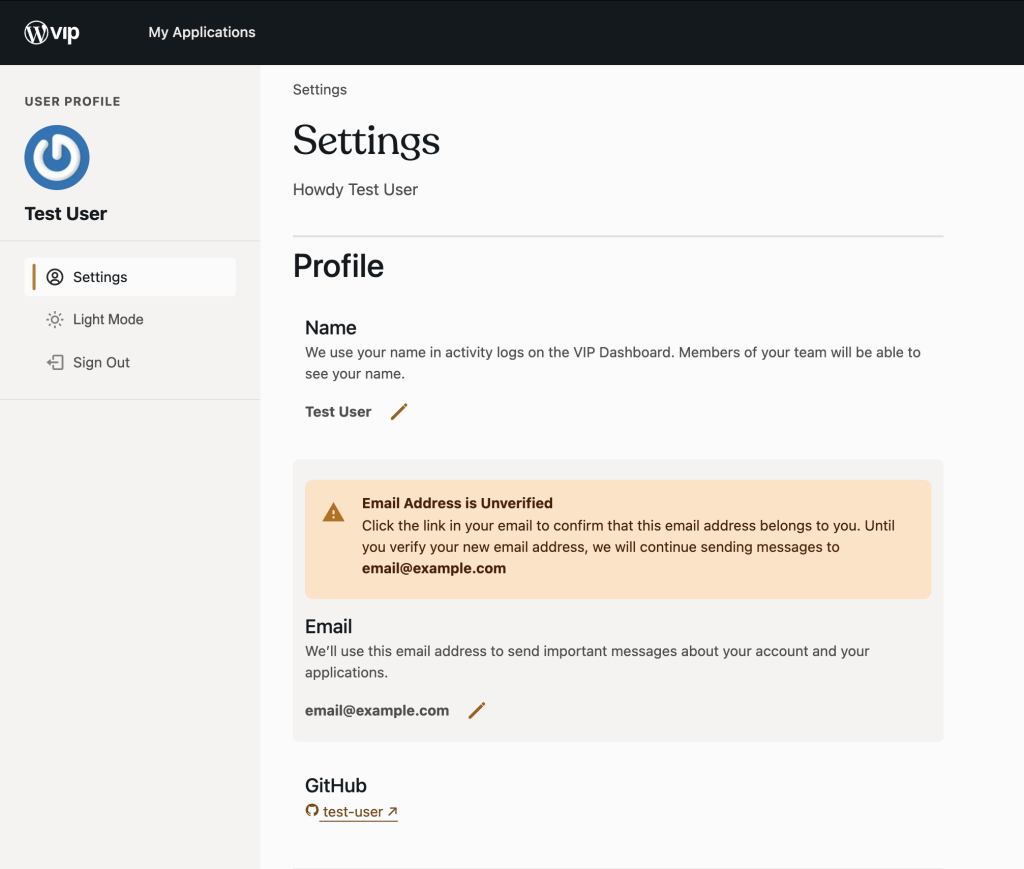
Name
A user’s “Name” value is required for Audit Logs and is displayed in an organization’s People panel.
To update the “Name” value:
- Select the pencil icon to the right of the current “Name” value.
- Replace or modify the “Name” value in the editable field.
- Select the button labeled “Save“.
An updated “Name” value will replace the previous value on an organization’s People panel. In Audit Logs, only logs associated with the user that are generated after the update will use the new value.
Important messages about a user’s account and the applications they have access to are sent to the email address that is set for a user’s “Email” value.
To update the “Email” value:
- Select the pencil icon to the right of the current “Email” value.
- Replace or modify the “Email” value in the editable field.
- Select the button labeled “Save“.
Before the updated value for “Email” is associated with the user’s account, it must be verified that the email address is valid and reachable by the user.
Verify an email address
An verification email is automatically sent to the updated email address requested by the user. When the email is received, select the button labeled “Verify new email” to complete the verification process.
The link in verification email messages expire 12 hours after they are created. If the link expires, the user must begin the verification process again in the user’s Settings panel.
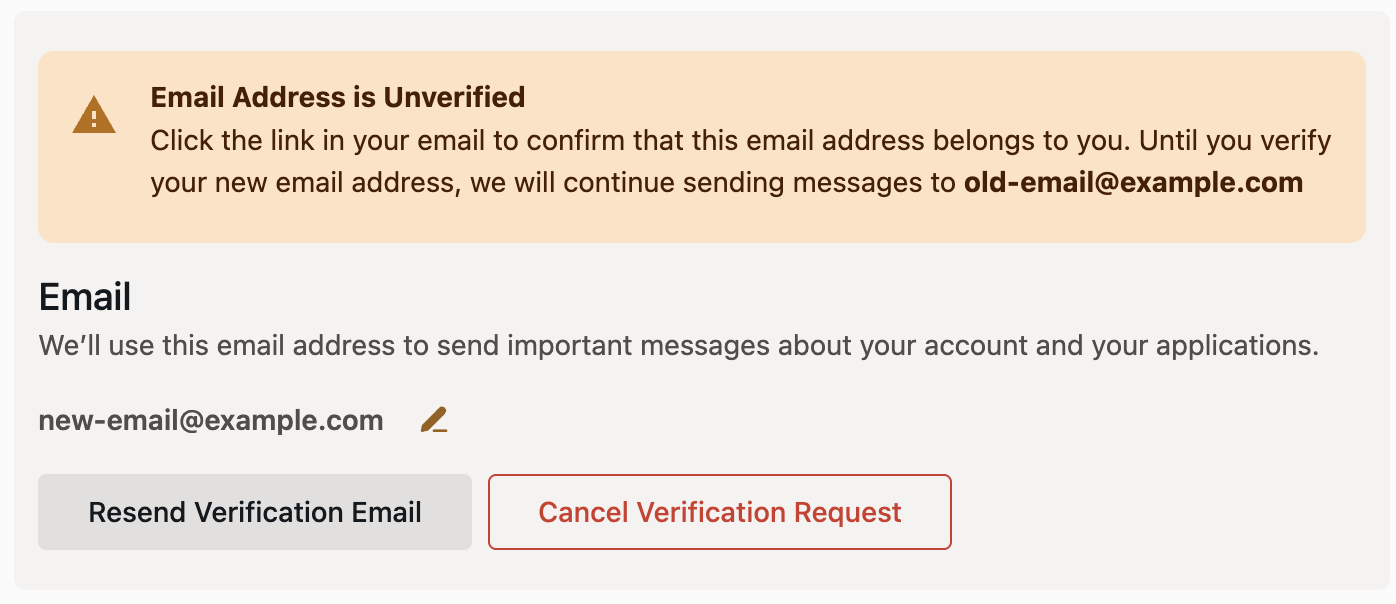
Until the updated “Email” value is verified, a non-dismissible banner will be displayed to the user throughout the VIP Dashboard.

Resend or cancel a verification email
The user can request the verification email to be sent again by selecting the button labeled “Resend Verification Email” in the Settings panel.
To cancel the verification process, select the button labeled “Resend Verification Email” in the Settings panel. This will also cancel the request to update “Email” to the new value, and the previous value will be restored.
Multi-Factor Authentication
The “Multi-Factor Authentication” section of the Settings panel displays a summary of a user’s configured MFA methods for logging in to the VIP Dashboard including:
- Preferred MFA Method (e.g., Passkeys, SMS)
- Configured MFA Methods (e.g., Backup Codes, Passkeys, SMS)
- Authentication Method (e.g., GitHub, WordPress.com, SSO)
A user can add, edit, or configure existing MFA methods for their VIP Dashboard user account by selecting the button labeled “Manage MFA” positioned at the right hand side of the “Multi-Factor Authentication” section.
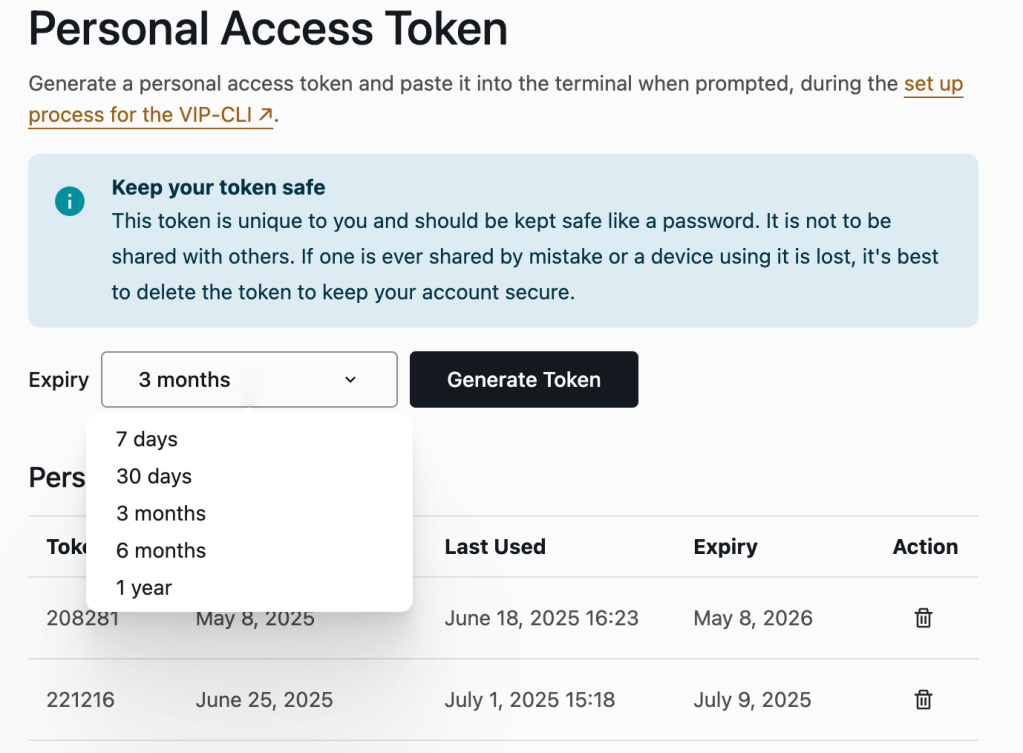
Personal Access Token
Note
Personal Access Tokens are unique to each VIP Dashboard user and should be kept safe like a password. If a token is ever shared by mistake—or a device using a token is lost—it is best to delete the token to protect the user’s account.
A table in the “Personal Access Token” section lists Personal Access Tokens that were generated for a user’s VIP Dashboard account and have not yet expired. Additional information for each Personal Access Token is organized across five columns:
- Token ID: Unique identifier for the Personal Access Token.
- Created: Date the Personal Access Token was generated by the user.
- Last Used: Most recent date the Personal Access Token was used to authenticate the user’s account.
- Expiry: Date the Personal Access Token will expire.
- Action: Delete the Personal Access Token by selecting the button labeled with a trash can icon.
Generate a Personal Access Token
A Personal Access Token is required for authenticating a user’s VIP Dashboard account during the VIP-CLI installation process.
To generate a new Personal Access Token:
- Select a duration of time for a token to remain valid before it expires from the dropdown menu labeled “Expiry”. A token can be set to expire in as little as 7 days or remain valid as long as 1 year.
- Select the button labeled “Generate Token”.
- Select the button labeled “Copy” to add the token value to the user’s clipboard.
Once a Personal Access Token has expired, it cannot be used again. The user must generate a new Personal Access Token to log back in to VIP-CLI.
When a Personal Access Token expires, the user will be notified with the following message in the command line when attempting to run a VIP-CLI command:
Unauthorized: Your token has expired due to inactivity, please logout with vip logout then try again.
Last updated: July 02, 2025