Connect an MCP client to Secure MCP
Secure MCP is available at a single endpoint: https://api.wpvip.com/mcp. The VIP MCP and WordPress MCP toolsets are both accessed through this endpoint; neither has its own endpoint. Connect any Model Context Protocol (MCP)-compatible client once via a browser-based OAuth authorization. The client handles token refresh automatically thereafter.
Which tools an agent can use in a session depends on the Secure MCP configuration: An Org admin must have activated Global MCP for the organization, and an Org or App admin must have enabled the relevant toolset for the application.
Prerequisites
- A VIP Dashboard account with at least one role on at least one organization (the agent’s token inherits the permissions of the authorizing user).
- Secure MCP activated for the organization, with at least one toolset enabled for the application the agent will operate on.
- A supported MCP client locally installed.
- The ability to open a browser on the client machine (required for the OAuth consent step).
Claude Desktop
Go to Settings -> Connectors and select Add -> Add Custom Connector.
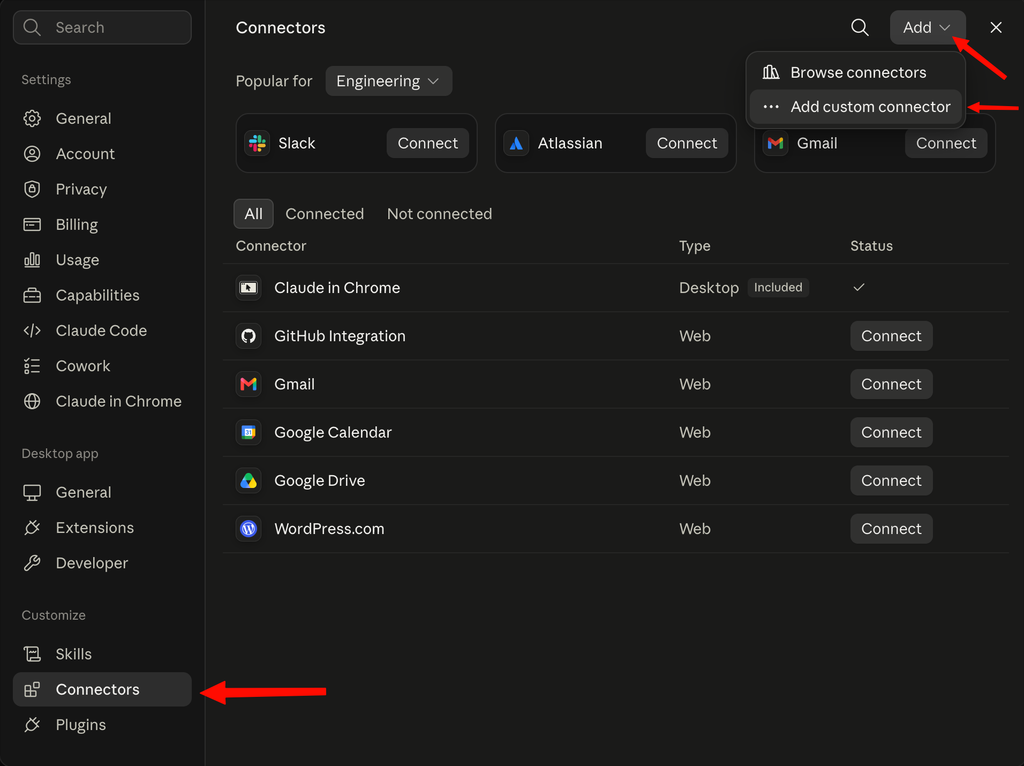
Claude Enterprise Users
For Claude Enterprise users, the Add Custom Connector option may not be available; an Administrator of your Claude Enterprise Plan would need to add the connector so that it’s available as an option under Browse.
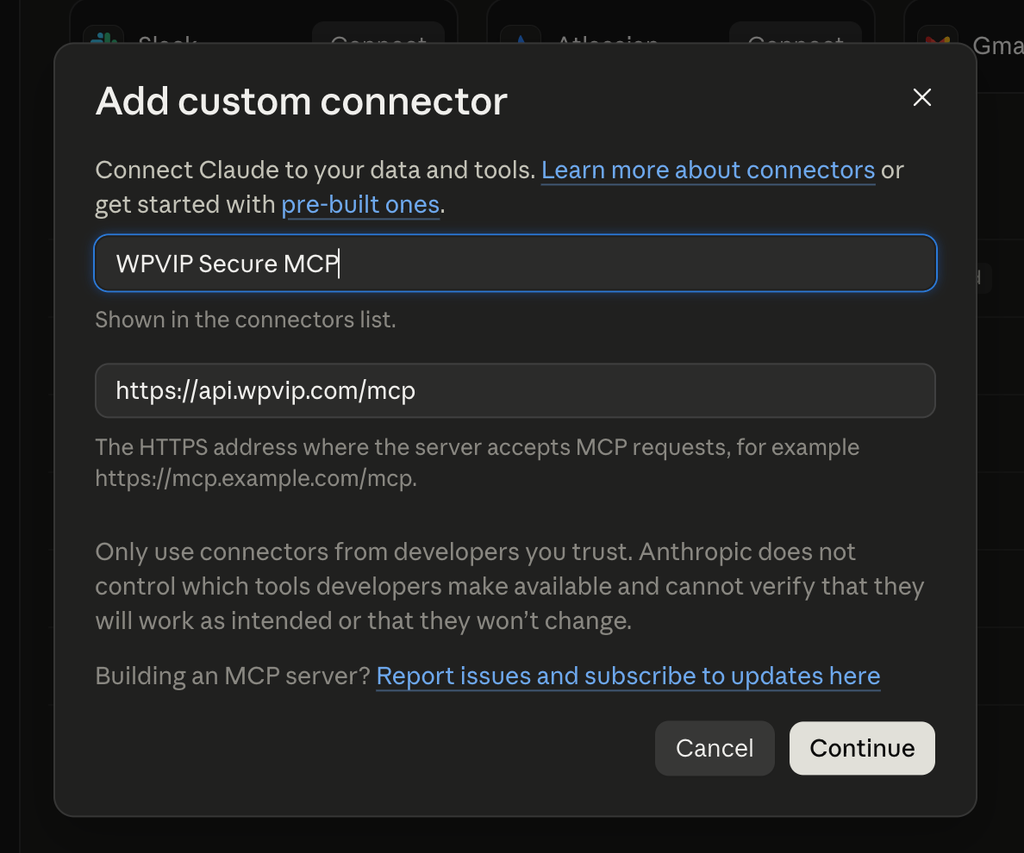
Fill out the details as shown, using the URL https://api.wpvip.com/mcp and click Continue:
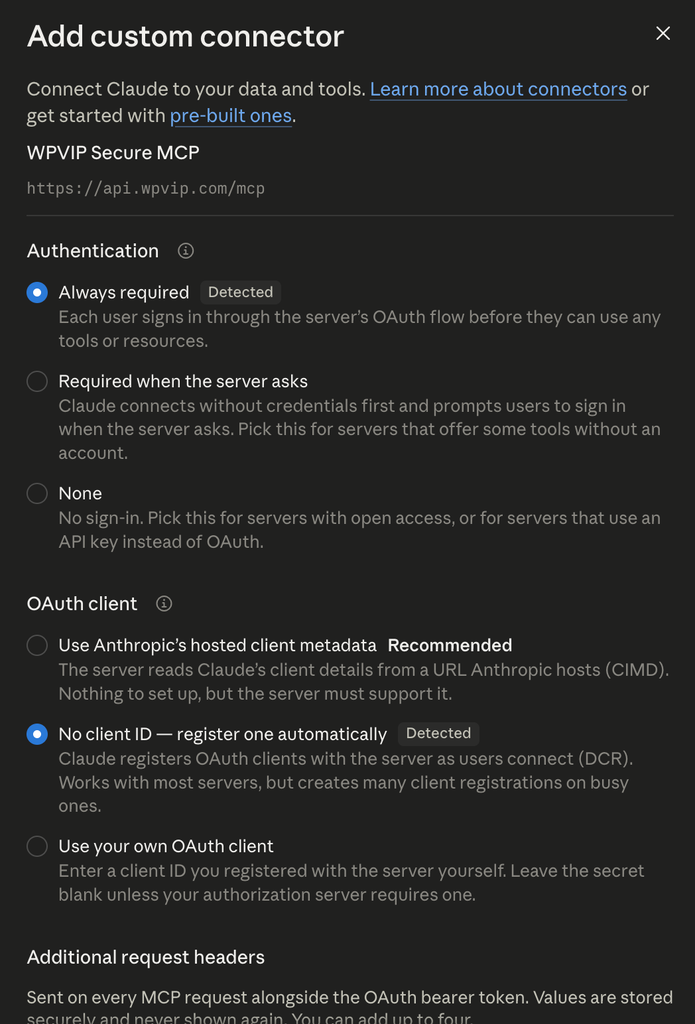
Select the Authentication “Always Required” and OAuth client “No client ID options:
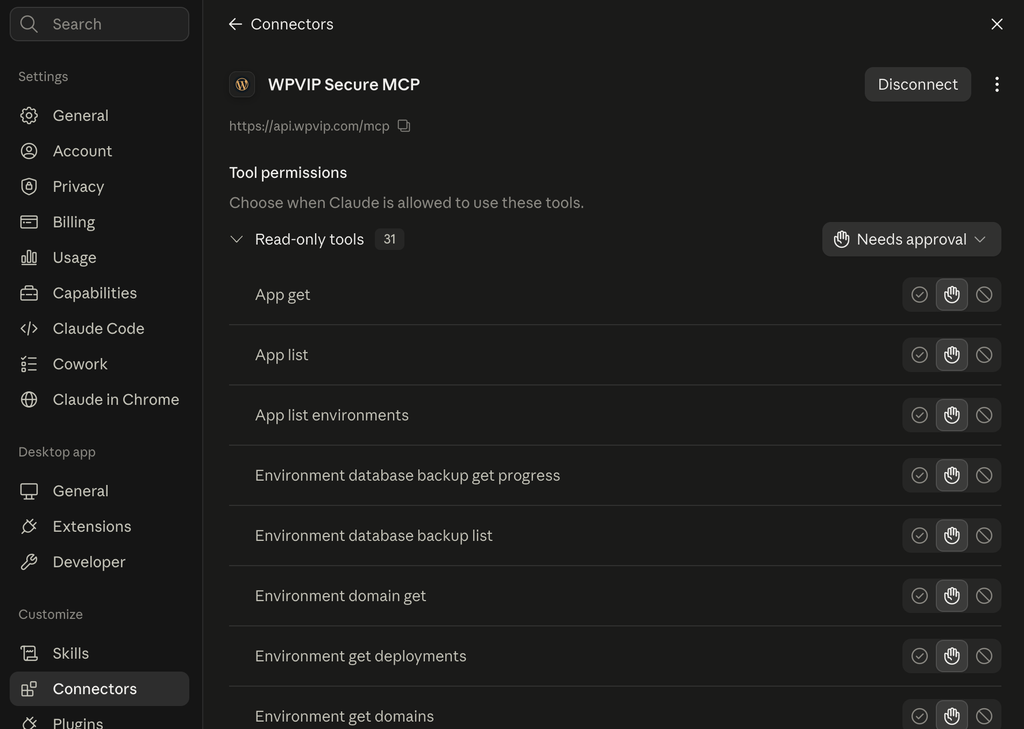
Connect the MCP server:

Individual tool permissions can then be configured as needed:
Claude Code
From a terminal, add the server:
claude mcp add --scope user \
    --transport http vip-platform https://api.wpvip.com/mcp
The --scope user scope registers the server for the user account rather than the current project. Claude Code launches the OAuth flow in the default browser on the first request. Approve the authorization request in the VIP Dashboard.
To verify the connection is established:
claude mcp list
The vip-platform server appears in the output with a connected status.
Codex CLI
Edit ~/.codex/config.toml and add:
[mcp_servers.vip-platform]
url = "https://api.wpvip.com/mcp"- Open Codex.
- Log in to the VIP Dashboard if prompted and select Authorize.
Cursor
- Open Cursor settings > MCP > Add new global MCP server.
- Paste the following configuration:
{
  "mcpServers": {
    "vip-platform": {
      "url": "https://api.wpvip.com/mcp"
    }
  }
}- Save. Cursor opens a browser for OAuth authorization.
- Log in to the VIP Dashboard if prompted and select Authorize.
Gemini CLI
Edit ~/.gemini/settings.json and add:
{
  "mcpServers": {
    "vip-platform": {
      "type": "http",
      "url": "https://api.wpvip.com/mcp"
    }
  }
}If the file does not exist yet, create it at that path. The Gemini desktop app does not support MCP connections; use the Gemini CLI.
Other clients
Any MCP client that supports Streamable HTTP with OAuth 2.0 and PKCE connects directly to the endpoint:
{
  "mcpServers": {
    "vip-platform": {
      "url": "https://api.wpvip.com/mcp"
    }
  }
}Clients that only speak STDIO can use the mcp-remote bridge:
{
  "mcpServers": {
    "vip-platform": {
      "command": "npx",
      "args": ["-y", "mcp-remote", "https://api.wpvip.com/mcp"]
    }
  }
}Verify the connection
Ask the agent: “List my VIP applications.” A response listing applications confirms the connection is working. If an auth prompt appears instead, complete it and ask again.
To enumerate the tools available for the connected account, ask: “What tools do you have for the VIP Platform?” The agent lists the tools registered for the current user’s permissions and the toolsets enabled for the application.
Step-up verification
Some sensitive write operations require a step-up verification before the action runs. This is the same extra verification that appears in the VIP Dashboard for higher-risk changes.
Step-up may be required for actions that affect production traffic, access controls, security settings, domains, deployments, database operations, or other high-impact platform states.
What happens
- The agent attempts a write action that requires step-up verification.
- The action is paused.
- The agent receives a step-up response and displays a verification link.
- The user opens the link in a browser and completes verification.
- The user returns to the agent and says something like: “I completed step-up. Please continue.”
- The agent completes the original action.
The verification link is tied to the specific action being attempted. Completing step-up does not give the agent broader elevated access.
Example
Typically, the agent will display something like this when step-up verification is required:
WordPress VIP requires step-up verification before this change can be made.

The action has not run yet.

Open this link and complete verification:

When done, tell me "I completed step-up" and I will continue.
Troubleshooting step-up verification
If the agent displays raw JSON instead of something like the above, look for a field named verificationUrl and open that URL directly.
If the agent does not continue after verification is complete:
- Tell the agent: “I completed step-up. Continue the original action.”
- If it still fails, retry the original request once.
- If it still fails, contact VIP Support with the failure details.
Caution
Do not paste access tokens or credentials into the agent. The elevated token stays inside WordPress VIP and is not shown to the user or the MCP client.
Tokens and sessions
| Token type | Lifetime |
|---|---|
| Access token (JWT) | 14 days |
| Refresh token | 30 days |
| Authorization code | 5 minutes, one-time use |
| Registered MCP client | 14 days — the client re-registers and re-authorizes automatically after expiry |
Tokens are tied to the authenticated VIP Dashboard user. Do not share an access token, as it carries the user’s identity and permissions.
To revoke access immediately, an Org admin should deactivate Global MCP via the Org Integrations panel — or contact VIP Support.
Troubleshoot
Authorization page does not open
The client uses a loopback URL (http://localhost:PORT/callback) for the OAuth redirect. Ensure loopback addresses are reachable from the client machine. Firewalls or network policies that block loopback connections prevent the OAuth flow from completing.
Token expired — tools return authentication errors
If both the access token and refresh token have expired, reconnect the client by repeating the setup steps. The client re-registers and completes a new OAuth flow automatically on the next connection attempt.
Expected tools are missing after connecting
Secure MCP only registers tools the authenticated user has permission to use from the toolsets enabled for the application. If an expected tool is not available, verify that Secure MCP is active, that the relevant toolset is enabled for the application, and that the user’s Org and App roles are correct in the People panel.
Last updated: August 24, 2026