Use Enterprise Search on a VIP Local Development Environment
Enterprise Search is a search solution and a performance-enhancing layer developed by WordPress VIP. Enterprise Search can be enabled on a VIP Local Development Environment for testing and development.
Prerequisites
- VIP-CLI is installed and is updated to the most current version.
- The user has experience with successfully creating a VIP Local Development Environment.
Set up a local environment
- Follow the steps to create a VIP Local Development Environment as
- a WordPress multisite (
--multisite=y) - with Elasticsearch enabled (
--elasticsearch) - with the
--app-codeoption set to the path of agit cloneof an application’s GitHub repository on the local machine. - and the custom
--slugvalue assigned toexample-site.
- a WordPress multisite (
This command example demonstrates how to create an environment with the above settings:
vip dev-env create --multisite=y --elasticsearch --app-code="/Users/user/vip-go-skeleton" --slug=example-site
- After the local environment is created, start the environment with the command:
vip dev-env start --slug=example-site
Once created, the local environment will have only one network site, the main site (ID 1). - Log in to the WordPress Admin dashboard of the main site with the default login credentials at the generated URL:
http://example-site.vipdev.lndo.site/wp-admin - After successfully logging in, navigate to the home page on the front end:
http://example-site.vipdev.lndo.site
The WordPress Admin Toolbar is located at the top of the browser window.
Enable Enterprise Search
To enable Enterprise Search and Search Dev Tools:
- Locate the
vip-config.phpfile in thevip-configdirectory of the locally cloned application GitHub repository. - Open
vip-config.phpin a file editing application. - In
vip-config.php, add and define theVIP_ENABLE_VIP_SEARCHandVIP_ENABLE_VIP_SEARCH_QUERY_INTEGRATIONconstants astrue:
/**
 * Enable VIP Search
 *
 */
define( 'VIP_ENABLE_VIP_SEARCH', true );
define( 'VIP_ENABLE_VIP_SEARCH_QUERY_INTEGRATION', true );- Save the file in its updated state.
- Verify that Enterprise Search has been successfully enabled:
- In the WordPress Admin dashboard: Locate the listed item labeled “Enterprise Search” in the navigation menu at the left,.
- On the front end: Locate the Search Dev Tools dropdown link in the WordPress Admin Toolbar to the right of the Query Monitor dropdown link.
- In the command line, create a new Elasticsearch index for the local environment with the command:
vip dev-env exec --slug=example-site -- wp vip-search index --setup
The user will be prompted to acknowledge two warnings; that theindexcommand is a destructive operation and that any previously existing indexes will be deleted. Both warnings can be dismissed by entering the optiony.

Test Enterprise Search
A sample page that contains the word “example” is automatically included in a newly created local WordPress environment. This page can be used to run a test to verify that Enterprise Search is enabled and the Elasticsearch index has been created as expected.
- Load the home page URL of the local site in the browser’s address bar:
http://example-site.vipdev.lndo.site - Search for the term “example” by reloading the browser with
/?s=exampleappended to the home page URL:http://example-site.vipdev.lndo.site/?s=example - Locate the Search Dev Tools dropdown link in the WP Admin Toolbar to the right of the Query Monitor dropdown link.
- Access Search Dev Tools in the WP Admin Toolbar by selecting the Search Dev Tools dropdown link labeled “Search: <x> query“.
- Expand the results of the query by selecting the title “+ <x> result(s) that took <x> ms“. The query results will be displayed in JSON format and will look similar to this example:
{
  "took": 17,
  "timed_out": false,
  "_shards": {
    "total": 1,
    "successful": 1,
    "skipped": 0,
    "failed": 0
  },
  "hits": {
    "total": {
      "value": 1,
      "relation": "eq"
    },
    "max_score": 0.0024214478,
    "hits": [
      {
        "_index": "vip-200508-post-1",
        "_type": "_doc",
        "_id": "2",
        "_score": 0.0024214478,
        "_source": {
          "post_id": 2,
          "ID": 2,
          "post_author": {
            "raw": "vipgo",
            "login": "vipgo",
            "display_name": "vipgo",
            "id": 1
          },
          "post_date": "2023-05-17 09:33:06",
          "post_date_gmt": "2023-05-17 09:33:06",
          "post_title": "Sample Page",
          "post_excerpt": "",
          "post_content_filtered": "",
          "post_content": "#CONTENT TRUNCATED#",
          "post_status": "publish",
          "post_name": "sample-page",
          "post_modified": "2023-05-17 09:33:06",
          "post_modified_gmt": "2023-05-17 09:33:06",
          "post_parent": 0,
          "post_type": "page",
          "post_mime_type": "",
          "permalink": "http://example-site.vipdev.lndo.site/sample-page/",
          "terms": [],
          ...
        }
      }
    ]
  }
}
Test indexing
To verify that indexing is working as expected:
- Create and publish a new test post with the title “New test post” and the content “This post contains the word potato for testing.”
- On the front end of the site, perform a search for the term “potato” by reloading the browser with
/?s=potatoappended to the home page URL:http://example-site.vipdev.lndo.site/?s=potato - Refer to the Search Dev Tools panels to confirm that Enterprise Search has returned “1 result” for the search term “potato”.
Test indexing with the validate-counts command
Successful indexing can also be verified in the command line. Use the validate-counts command to check the health of the index and verify that the new post has been indexed.
vip dev-env exec --slug=example-site -- wp vip-search health validate-counts
If indexing is operating as expected, the command output will display identical database (DB) and index (ES) post counts for the post types post and page. For example:
Validating post count

✅ no inconsistencies found when counting entity: post, type: post, index_version: 1 - (DB: 2, ES: 2, Diff: 0)
✅ no inconsistencies found when counting entity: post, type: page, index_version: 1 - (DB: 1, ES: 1, Diff: 0)
Add an index for a new network site
By default, an index is not automatically created for a new network site. Follow the steps below to create a new network site, create an index for the new site, and learn how to verify that the new index is working as expected.
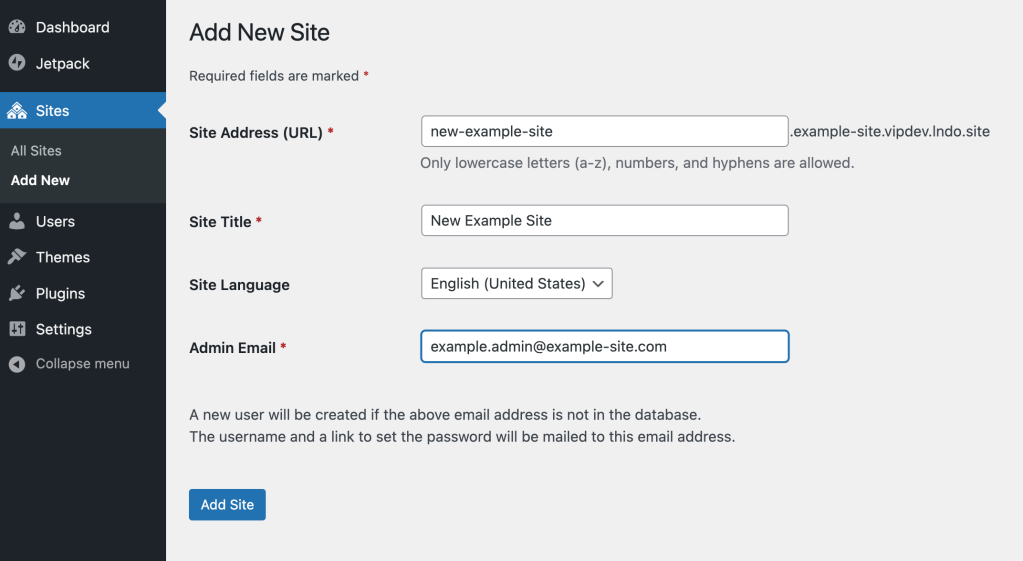
- Create a new site on the network by navigating to the “Sites” screen in the Network Admin:
http://example-site.vipdev.lndo.site/wp-admin/network/sites.php - Select the button labeled “Add New“.
- Complete the field prompts with the following values:
- Site Address (URL): new-example-site
- Site Title: New Example Site
- Admin Email: example.admin@example-site.com (or a preferred email value)
- Select “Add Site“.
- Navigate to the home page of the site on the front end.
- search for the term “hello” by reloading the browser with
/?s=helloappended to the home page URL:http://example-site.vipdev.lndo.site/?s=hello - Open the Search Dev Tools panel to view more information about the search results.
Search Dev Tools will indicate that an index exists for the new site, but no posts have been indexed.

- In the command line, use the
validate-countscommand to check the health of the site index.
vip dev-env exec --slug=example-site -- wp vip-search health validate-counts --url=new-example-site.example-site.vipdev.lndo.site
In this example command output, the health report indicates there are no posts in the site index:
Validating post count

🟧 skipping, because there are no documents in ES when counting entity: post, type: post, index_version: 1
🟧 skipping, because there are no documents in ES when counting entity: post, type: page, index_version: 1
- Run the
indexcommand with the--setupoption to sync the posts in the database with the index. Target the network site by including the option--url=new-example-site.example-site.vipdev.lndo.site.
$ vip dev-env exec --slug=example-site -- wp vip-search index --setup --url=new-example-site.example-site.vipdev.lndo.site

⚠️  You are about to run a destructive operation. Are you sure? [y/n] y
Adding post mapping…
Success: Mapping sent
Indexing posts...
Processed 2/2. Last Object ID: 1
Number of posts indexed: 2
Total time elapsed: 0.524
Success: Done!
Note
On a local environment with no public traffic, the --setup option can be safely used for re-indexing. However on a launched production site, the versioning option should be used instead of --setup whenever possible.
- Search for the term “hello” again:
http://new-example-site.example-site.vipdev.lndo.site/?s=hello
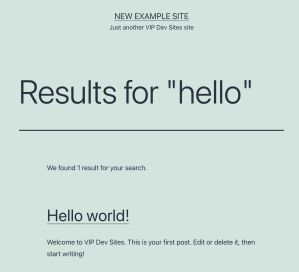
The search result will now be displayed.
- The Search Dev Tools will also return a search result:

Offload to WP_Query
By default, non-search queries are not offloaded to Enterprise Search. To offload non-search queries to Enterprise Search, WP_Query must be modified.
- Use
wp post generateto generate 10 new posts with Lorem Ipsum content in the main site (site ID 1). The generated posts will be immediately indexed.
curl -N http://loripsum.net/api/5 | vip --slug=example-site dev-env exec -- wp post generate --post_content --count=10
- Run a slightly modified version of the same command, and apply an older post date with the
--post-dateoption.
curl -N http://loripsum.net/api/5 | vip --slug=example-site dev-env exec -- wp post generate --count=10 --post_type=post --post_date=1999-01-04
- Navigate to the home page to review the newly generated posts:
http://example-site.vipdev.lndo.site.
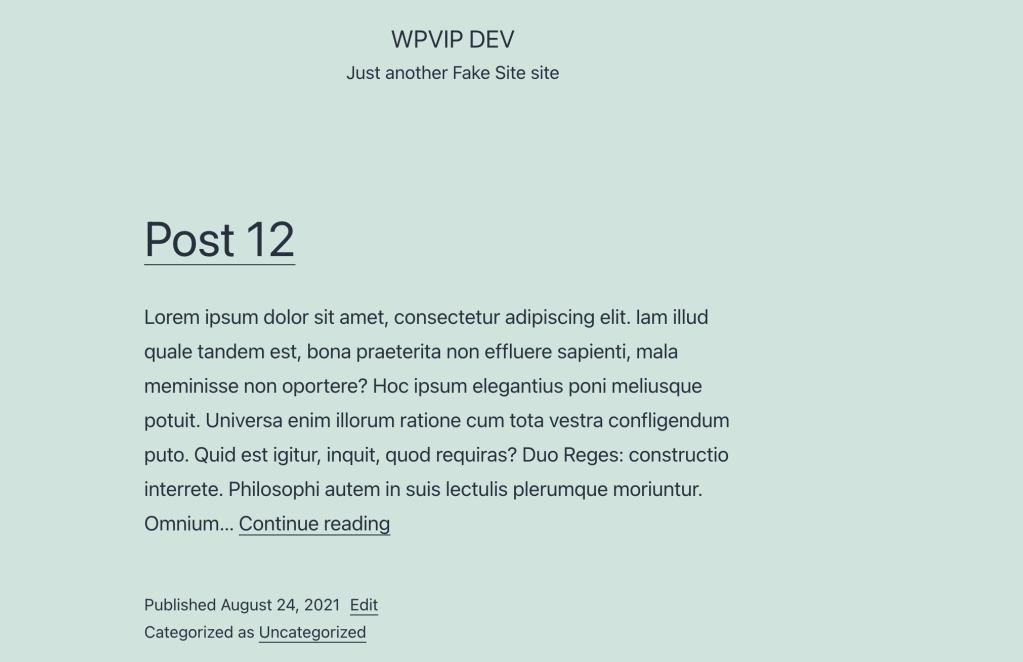
- Navigate to the second page of posts:
http://example-site.vipdev.lndo.site/page/2/. - Open the Query Monitor panel and view “Queries”. Locate the query that determines which posts are displayed on the second page:
SELECT SQL_CALC_FOUND_ROWS wp_posts.ID
 FROM wp_posts
 WHERE 1=1
 AND wp_posts.post_type IN ('post', 'page')
 AND (wp_posts.post_status = 'publish'
 OR wp_posts.post_status = 'private')
 ORDER BY wp_posts.post_date DESC
 LIMIT 10, 10
If the query does not appear, the object cache may need to be flushed with wp cache flush.
- In the footer, the “Recent Posts” widget displays the latest five posts. The query for this widget can also be found in Query Monitor:
SELECT wp_posts.ID
 FROM wp_posts
 WHERE 1=1
 AND wp_posts.post_type = 'post'
 AND ((wp_posts.post_status = 'publish'))
 ORDER BY wp_posts.post_date DESC
 LIMIT 0,5
The query for the “Recent Posts” widget and for the posts on the second page are usually relatively fast, but they can become slow on a site with numerous posts and a large volume of public traffic.
- On the user’s local machine, navigate to the
/client-mu-pluginsdirectory in the vip-go-skeleton directory. Create a new file namedsearch.php.
cd /vip-go-skeleton/client-mu-plugins
touch search.php
- Add the example code shown below to
search.php. The code in this example uses thepre_get_postshook to offload both queries (e.g. not of the back-end or category type):
<?php

/**
 * Offload to ES
 *
 */
function vip_sample_es_offload( $query ) {
	if ( is_admin() ) {
		return;
	}

    if ( ! $query->is_category() ) {
        $query->set( 'es', true );
    }
}
add_action( 'pre_get_posts', 'vip_sample_es_offload' );- Navigate to the local environment’s home page and select the Search Dev Tools panel from the WP Admin Toolbar.


- Refer to “Queries” in the Query Monitor panel. Locate the
/* ES_WP_Query Shoehorn */comment at the end of the query. This message indicates that the query was generated byes-wp-query:

When Elasticsearch returns the list of post IDs that matched the query, the database is queried (via the “shoehorn”) to obtain the post data needed to construct the HTML result that a user sees on the front end.
Elasticsearch queries run first, and any other MySQL queries (without the shoehorn comment) run afterward.
Remove the environment
When no longer needed, remove the local environment from the user’s local machine with the command:
vip dev-env destroy --slug=example-site
Last updated: August 08, 2024