Manually launch a site on a multisite
The Network Site launch tool in the VIP Dashboard is strongly recommended for launching sites on a WordPress multisite.
Launching a network site is also possible by completing the VIP-CLI commands and WordPress Network Admin updates that are outlined below.
Professional Service Upgrade
Customers who add WordPress VIP Launch Day Services to their support package will have a Technical Account Manager (TAM) assigned to them to ensure a smooth launch for their site on the VIP Platform. VIP TAMs will draft and confirm a launch plan for the site, guide customers through the necessary steps leading up to and including the site launch, and advise customers on any last-minute issues that may arise.
Prerequisites
- Read through and complete the steps outlined in Prepare for launch.
- A WordPress Super Admin user role is required to update site settings in the Network Admin.
- VIP-CLI is installed and has been updated to the most current version.
- Sites on a multisite cannot be self-launched until the main site (ID 1) has been launched, as explained in the order of launching sites on a multisite.
- If the site will be launched with a reverse proxy, ensure that the steps to configure a reverse proxy have been reviewed.
1. Change the site URL
- Log in to any site on the multisite.
- Hover over the “My Sites” label in the upper left hand corner of the WordPress Admin dashboard to access the flyout menu and select:
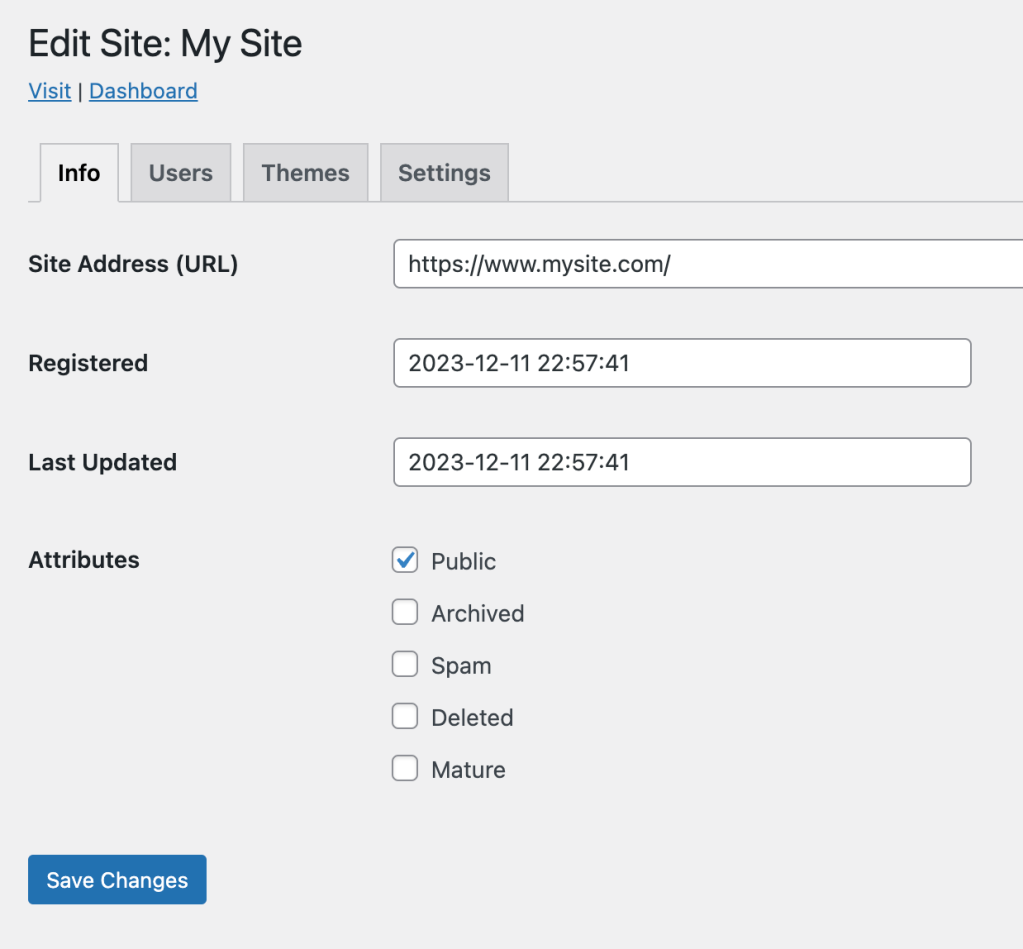
My Sites > Network Admin > Sites - On the “Sites” page of the multisite Network Admin, hover over the site to be launched and select the “Edit“ link.
- Select the “Info” tab.
- Update the Site Address (URL) to the final production URL. This should match the domain that was mapped in the Prepare for launch steps.
- Select “Save Changes.”
Note
Updating the Site Address (URL) will also update the home and siteurl values, as well as the entry in wp_blogs.
2. Dry-run search-replace from current URL to production URL
VIP-CLI command examples
For demonstration purposes, the <app-name> value example-app and the <env> value production are used in the VIP-CLI command examples below. Read more about how to target environments in VIP-CLI commands.
Target search-replace on tables specific to the site
The search-replace operation will update the URLs (including content and media URLs) that exist in the site’s database from the old domain (usually the VIP convenience domain) to the new mapped production domain. Run the search-replace command first with the --dry-run option in order to review the qualifying changes without altering the database.
vip @example-app.production -- wp search-replace mysite.go-vip.net/site www.mysite.com --all-tables-with-prefix --report-changed-only --url=www.mysite.com --dry-run
Caution
The above command performs a targeted search-replace within the site tables corresponding to the URL specified (to the value that was updated in the previous step). Verify that the output shows only the tables prefixed with the correct site ID, for example wp_2_posts.
Run search-replace on all tables of the multisite
To perform a search-replace across all tables of the multisite, adjust the command similar to this example:
vip @example-app.production -- wp search-replace mysite.go-vip.net/site www.mysite.com --all-tables --report-changed-only --dry-run
Caution
Depending on the size of the database, a search-replace across the entire database may take a long time to complete and add extra load. Contact VIP Support if assistance is needed to run a search-replace across the entire database or if there are related questions.
3. Run final search-replace
An example of the search-replace command to update the current URL to a production URL by removing the --dry-run option:
vip @example-app.production -- wp search-replace mysite.go-vip.net/site mysite.com --all-tables-with-prefix --report-changed-only --url=www.mysite.com
4. Flush object cache
An example of a command to flush the object cache:
vip @example-app.production -- wp cache flush --url=www.mysite.com5. Test the site by updating the hosts file
For WordPress site launches, the search-replace step in the VIP Dashboard launch flow will update the URL values in the database with the new domain, but public traffic cannot access the site until DNS records are updated to point to VIP.
Before a domain’s DNS is pointed to VIP, verify that the site loads and appears as expected from the front end. To do so, view the site in its current state by updating the local machine’s hosts file.
The site might display a warning that the site at the new URL is not secure. This is expected behavior if TLS certificates are not yet installed. This warning will disappear once DNS is pointed and TLS is installation is complete.
After verifying that the site is loading as expected, be sure to remove the test lines that were added to the hosts file before updating the domain’s DNS.
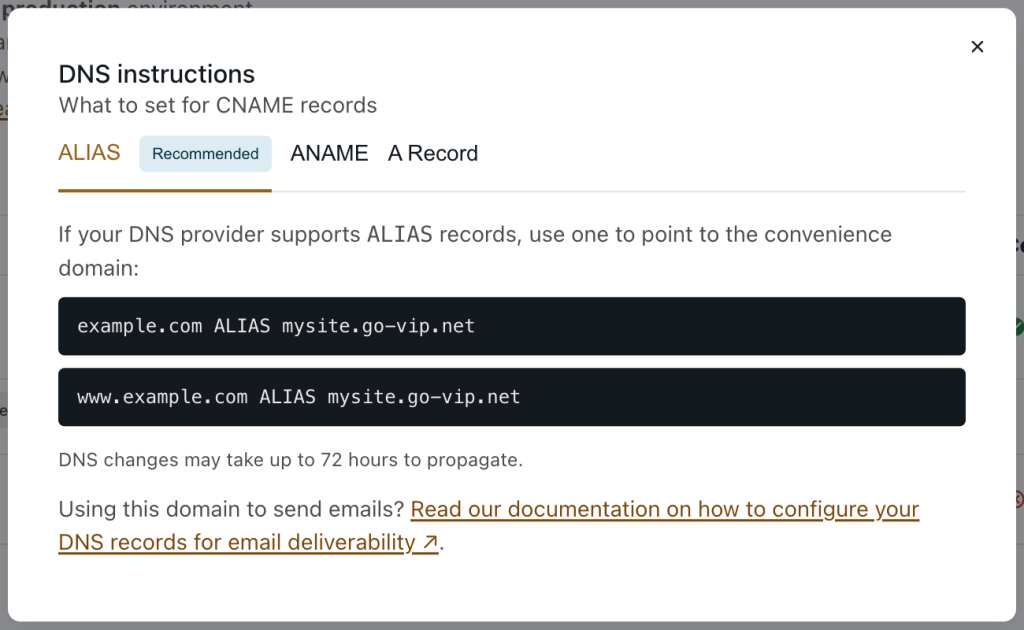
6. Point DNS to VIP
The DNS Instructions screen in the VIP Dashboard provides ALIAS, ANAME, and A Records for root domains and CNAME records for subdomains. VIP recommends using ALIAS records to route the DNS for root domains whenever possible.
For a VIP site to be available to the public, DNS must be updated with the domain’s DNS provider and pointed at VIP.
Once the DNS has been updated to point to VIP, the speed at which the new VIP site becomes visible to the public at the production URL will depend on the TTL that was set as part of launch preparation. DNS can take up to a full 24 hours to propagate around the world.
A service like DNS Checker can be used to confirm that the DNS was pointed correctly and ensure that it is propagating successfully.
The command dig <domain> can also be run via the Command Line Interface (CLI) to confirm that the DNS is pointed correctly to the ALIAS, ANAME, A Record, or CNAME provided via the VIP Dashboard.
Last updated: March 02, 2024