Developing with GitHub Codespaces
As an alternative to the VIP Local Development Environment, WordPress application code can be developed within a GitHub Codespaces environment. WPVIP provides configuration (config) files that create Codespaces environments based on WPVIP’s infrastructure. The config files can be further customized for the Codespaces environment to have nearly identical settings as an individual application.
GitHub Codespaces is a cloud-based development environment that enables developers to write, test, and debug code directly in the cloud. Refer to GitHub’s documentation to learn how to use Codepaces for testing and development.
Limitations
Though the GitHub Codespaces integration is designed to be as identical to a VIP Platform environment as possible, some features differ slightly or are not available. When developing features for an application that rely on these services, it is strongly recommended to stage changes and perform tests on a non-production VIP Platform environment.
- Page cache is not available.
- The VIP File System is not available. However, for images that are uploaded to a Codespaces environment, a built-in Photon service will perform dynamic image transformations that are nearly identical to the behavior on a VIP Platform environment.
- Cron control is not available. Scheduled cron events can be executed by an OS-based crontab system (disabled by default). Cron events are executed on a 15-minute interval by a
wp cron event run --due-nowcommand. Edit theCronsection ofdevcontainer.jsonto enable the built-in Cron system, or to adjust the interval value. - Databases in the codespace environment are MariaDB; VIP Platform environment databases are MySQL 8.
- The total available disk space on a Codespace virtual machine is 32 GB. For this reason, the total combined size of an application’s codebase, VIP MU plugins, the machine’s Linux image, runtimes, and any imports or additions to the database must be less than 32 GB.
Access
The .devcontainer/devcontainer.json config file for creating a Codespaces environment based on VIP’s infrastructure can be retrieved from the vip-go-skeleton repository. GitHub repositories for WordPress applications created after 1 February 2024 will already include .devcontainer/devcontainer.json by default.
Prerequisites
- Only customers with Enhanced, Signature, or Premier packages can use Codespaces within the wpcomvip GitHub organization. Qualifying customers must create a VIP Support request for the Codespaces feature to be enabled for their GitHub user account.
- The
devcontainer.jsonfile can be cloned to other GitHub repositories in order to work with Codespaces outside of the wpcomvip organization. - At minimum, a user must have a GitHub user role with Write access within the repository where Codespaces is used.
If .devcontainer/devcontainer.json does not yet exist within a WordPress application’s GitHub repository, it can be added.
- Create a new branch—or use an existing branch—in the application’s repository.
- Create a
.devcontainerdirectory in the repository root on the remote branch. - Add a copy of
devcontainer.jsonto the.devcontainerdirectory.
Create a new codespace
Codespaces environments are created per branch.
Prerequisite
To create a codespace environment based on WPVIP’s infrastructure, a copy of the .devcontainer/devcontainer.json file provided by WordPress VIP must exist on the working branch.
- Navigate to the GitHub interface for the branch’s repository.
- Select the branch from the dropdown menu labeled “Switch branches/tags“.
- Select the button labeled “<> Code“.
- In the displayed options, select the tab labeled “Codespaces“.
- Select the button labeled “Create codespace on codespace-example“.
In a new browser tab, a displayed output log will report progress on the creation of the new codespace. The creation process will take several minutes. The length of time required for creation can be reduced by configuring a prebuild for codespaces.
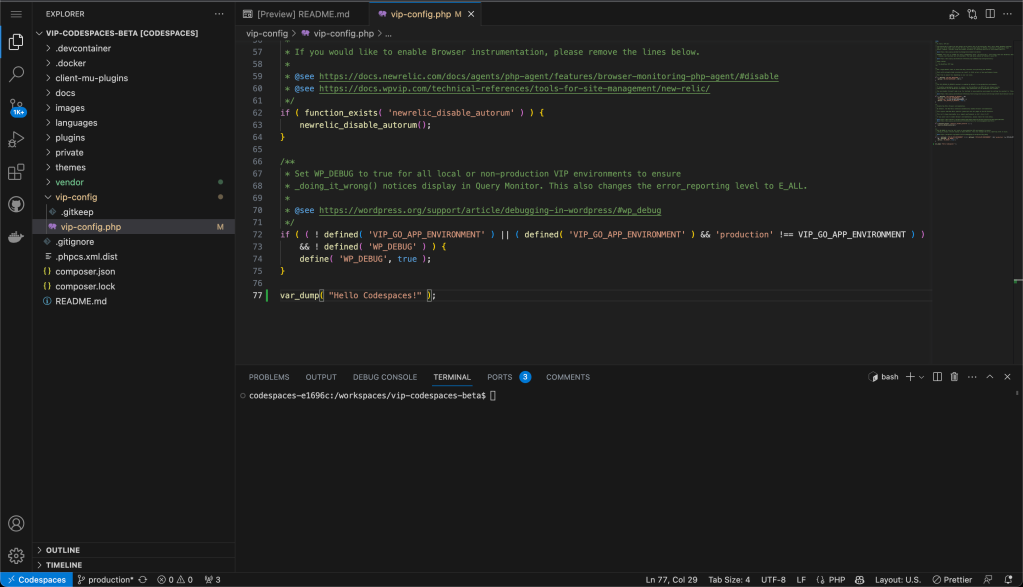
When creation of the codespace is complete, the content in the browser tab will refresh and display a Visual Studio Code (VS Code) interface.
Log in to WordPress
In the browser tab’s VS Code interface for a codespace that is in a running state:
- Select the tab labeled “Ports” located in the bottom half of the screen.
- In the row for “Application (80)”, select the value in the column labeled “Local Address“. Three icons will be displayed at the right of the local address value.
- Load the front end of the codespace environment in a new browser tab by either:
- Selecting the globe icon labeled “Open in Browser“.
- Or right-clicking on the local address value and selecting “Open in Browser” from the flyout menu.
- Access the WordPress login portal by appending
/wp-adminto the local address value in the browser’s address bar (e.g.,https://$CODESPACE_NAME-80.preview.app.github.dev/wp-admin). - Log in with the default user credentials, or user credentials that exist in a database that was imported to the codespace environment.
Default login credentials
Users can log in to the created codespace environment with default WordPress user account credentials.
Default username: vipgo
Default password: password
The default user account has an Administrator role on a WordPress single site and a Super Admin role on a WordPress multisite.
Log in to phpMyAdmin
Login credentials for phpMyAdmin are displayed in the terminal of the VS Code interface in the browser tab. These credentials will display each time a new codespace or VS Code terminal is created.
By default, the username for phpMyAdmin is vipgo. A unique password for phpMyAdmin is generated for each codespace. If a password value fails to display, it can be retrieved by running this command in the VS Code terminal:
cat /etc/conf.d/phpmyadmin-password; echo
In the browser tab’s VS Code interface:
- Select the tab labeled “Ports” located on the bottom half of the screen.
- In the row for “phpMyAdmin (81)”, select the value in the column labeled “Local Address“. Three icons will be displayed at the right of the local address value.
- Load phpMyAdmin for the codespace environment in a new browser tab by either:
- Selecting the globe icon labeled “Open in Browser“.
- Or right-clicking on the local address value and selecting “Open in Browser” from the flyout menu.
- In the prompt of the new browser tab, log in with the credentials that are displayed in the terminal panel of the VS Code interface.
Caution
Never modify the Visibility setting of the phpMyAdmin Port (Port 81). Setting the port’s visibility to anything other than Private will cause phpMyAdmin—and any imported data—to be vulnerable to attacks. The assigned login credentials for the port are not a sufficient security measure to prevent attacks.
Access WordPress Core files and VIP MU plugins
By default, WordPress Core files and VIP MU plugins are not exposed in the VS Code interface. If needed, these files can be surfaced for reference in the VS Code Explorer panel.
- Enter the VS Code Command Palette by either:
- Right-clicking anywhere in the Explorer panel and selecting “Add Folder to Workspace…“.
- Or selecting the key combination ⇧⌘P on the keyboard, then enter the prompt
Add folder to workspace.
- In the Command Palette field, highlight any existing values and replace them by entering the path value
/wp.
Last updated: January 09, 2025