User Agent Restrictions
Custom rules can be added to the VIP Dashboard’s User Agent Restrictions panel to block requests made by specific User Agents to an environment.
Blocking access by User Agent can be useful for an environment that hosts an intranet or has highly sensitive content. Blocking by User Agent is also useful for denying access to bots that are making suspicious requests from different IP addresses but with the same User Agent.
If an incoming request to an environment is from a User Agent that matches a rule configured in User Agent Restrictions, VIP’s CDN will return a 403 Forbidden error response for that request.
This includes requests that are:
- Cached or uncached
- From logged-in or anonymous users
- For static files, media files, REST API endpoints, or dynamically-generated content
- For a WordPress or a Node.js environment
Requests from services within Automattic’s networks require access to support the operation of a VIP application and are the only exception to the list of restricted requests above.
Note
Rules that are added to the User Agent Restrictions panel are global. If more granular control is needed, the VIP_Request_Block utility class can be used to block requests programmatically for specific User Agents.
Limitations
- A maximum of 25 rule entries can be added to User Agent Restrictions. If additional entries are needed, create a Support request.
- Configurations in a User Agent Restriction rule might unintentionally block external services and tools that connect to an application. To resolve the issue, the rule’s configurations will need to be edited or removed altogether.
- User Agent Restriction rules that are added to an environment must not block requests from the Automattic network, requests from User Agents associated with VIP services, or block site access for VIP Support. Blocking these requests—intentionally or unintentionally—might also block the ability for WordPress VIP to provide comprehensive support for a site(s) on that environment.
Best practices
As a best practice when blocking access by User Agent:
- Review an environment’s recent HTTP Request Logs to ensure that added rules will only impact the intended requests, whether the rules are for exact or partial matches.
- Take care not to block common browser User Agents or User Agents that look similar. Blocking requests from common browser User Agents can result in blocking real user requests.
Access
Prerequisites
- To view the User Agent Restriction rules for an environment, a user must have at minimum an App write role for that application or an Org member role.
- To edit the User Agent Restriction rules for an environment, a user must have at minimum an App admin role for that application or an Org admin role.
The User Agent Restrictions panel is located in the application view of the VIP Dashboard. Configurations added to the User Agent Restrictions panel are environment-specific (e.g., production, develop).
- Navigate to the VIP Dashboard.
- Select the environment to which the settings should apply from the environment dropdown located at the upper left of the VIP Dashboard.
- Select “Security Controls” from the sidebar navigation at the left of the screen.
- Select “User Agent” from the submenu.
Existing rules for an environment are listed in a table located in the main area of the User Agent Restrictions panel.
Add, edit, or remove rules
User Agent Restriction rules can be added, edited, or removed in either a form editor that has field prompts for values or in a text editor.
There are three parts to every rule that is added to the User Agent Restrictions panel:
- Condition (Required): Block a request if its User Agent matches the rule’s User Agent Identifier String at least partially (“Contains“) or matches it exactly (“Equals“).
- Identifier String (Required): The full or partial User Agent HTTP header to be restricted from accessing the environment.
- Note (Optional): A note applied to a rule or group of rules that provides context for the rule’s purpose.
Rules are case-insensitive. For example, the rule webscraper will match the User Agents WEBSCRAPER, WEBscraper, and webscraper.
Updates made to an environment’s User Agent Restrictions typically take 5 to 10 minutes to take effect.
Add a User Agent rule group
To add a User Agent Restriction rule group:
- Select the button labeled “+ Add” to enter the form editor dialog titled “Add User Agent group“.
- Select a condition (i.e. either “Contains” or “Equals”) for the rule from the dropdown menu labeled “Condition“.
- Enter an identifier string value for the User Agent header value (full or partial) to which the rule should be applied.
- Add another rule to the group currently being edited by selecting the button labeled “+ Add Row“. Repeat steps 2 and 3 for each rule added to the group.
- Optional: Add contextual information about the group of rules in the text field labeled “Notes“. The content added to this field will apply to all of the rules that are currently being edited.
- Select the button labeled “Add” to save the added rule configurations.
Edit a User Agent rule group
To edit an existing User Agent Restriction rule group:
- Select the linked text “Edit” located to the right of the existing rule group.
- Edit the existing configurations, or add a new rule by selecting the button labeled “+ Add Row“. A rule can be removed by selecting the trash can icon titled “Remove User-Agent” at the right of the rule’s row.
- Select the button labeled “Save” to save the updated rule configurations.
Remove a User Agent rule group
To remove an existing User Agent Restriction rule group:
- Select the trash can icon titled “Remove Rule” at the right of the row.
- Select the button labeled “Delete” in the dialog titled “Are you sure you want to delete the group?” to confirm the removal of the rule group.
To completely disable User Agent Restrictions and allow the environment to be accessible from anywhere on the internet, all User Agent rules must be removed.

Add, edit, or remove rule groups
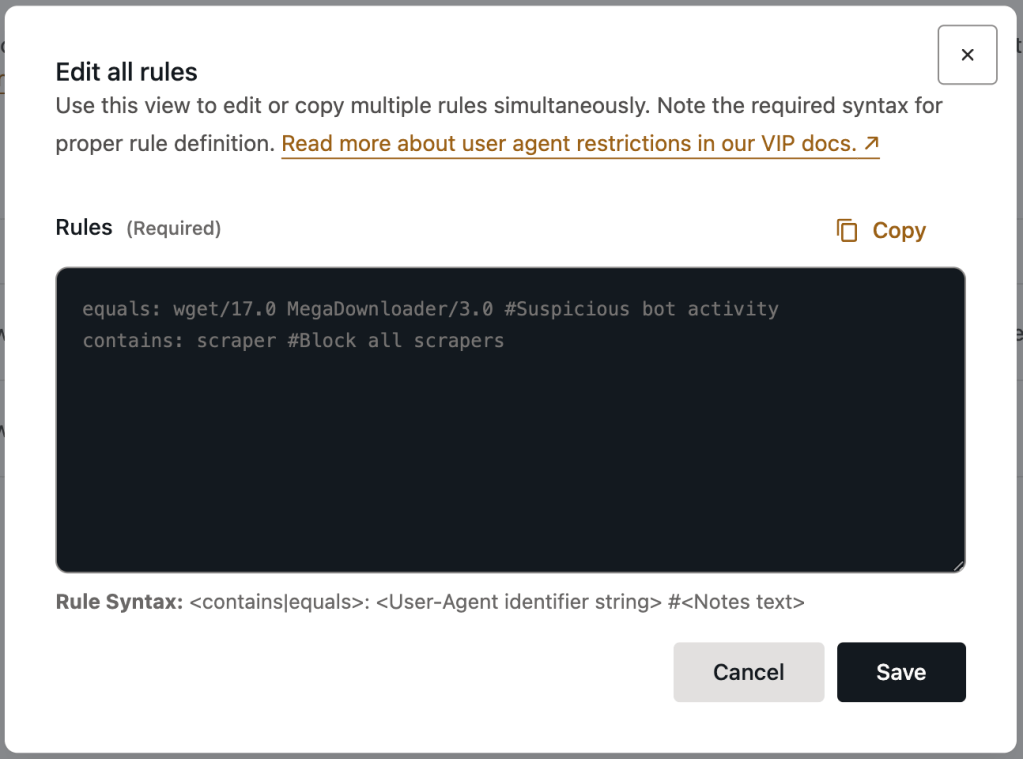
To add, edit, or remove rules in the text editor:
- Select the button labeled “Edit Full List”.
- Type or paste rule configurations into the text editor. Each rule should be added to its own separate line in the field. Ensure that every rule follows the required rule syntax.
- Select the button labeled “Save” to save the updated rule configurations.
Rule syntax
When adding or editing rules within the text editor, they must follow a specific syntax:
[contains|equals]: [user agent identifier string] #[optional note]
Use caution when adding rules that uses the contains conditional. In this example a rule is added with the intention to block requests from OpenAI GPTBot crawlers. However, the partial identifier string openai is too broad and will block all requests that contain openai which can have unintended consequences.
contains: openai #Block requests from OpenAI GPTBot crawler
In this example a rule is added to block requests from OpenAI GPTBot crawlers using the equals conditional. To be blocked, a request’s User Agent must exactly match the User Agent HTTP header Mozilla/5.0 AppleWebKit/537.36 (KHTML, like Gecko); compatible; GPTBot/1.1; +https://openai.com/gptbot.
equals: Mozilla/5.0 AppleWebKit/537.36 (KHTML, like Gecko); compatible; GPTBot/1.1; +https://openai.com/gptbot #Block requests from OpenAI GPTBot crawler
The optional note value #Block requests from OpenAI GPTBot crawler provides more context about the purpose of the rule for other team members who also have access to the User Agent Restriction panel.
Last updated: April 28, 2025